
2. How to setup this bridge network
If you want to access your TrueNAS SCALE directories from a VM, you must create a bridge interface for the VM to use.
Go to Virtualization, find the VM you want to use to access TrueNAS storage, and toggle it off.

Go to Network and find the active interface you used as the VM parent interface. Note the interface IP Address and subnet mask.
You can also get the IP address and subnet mask by going to Shell and entering ip a.

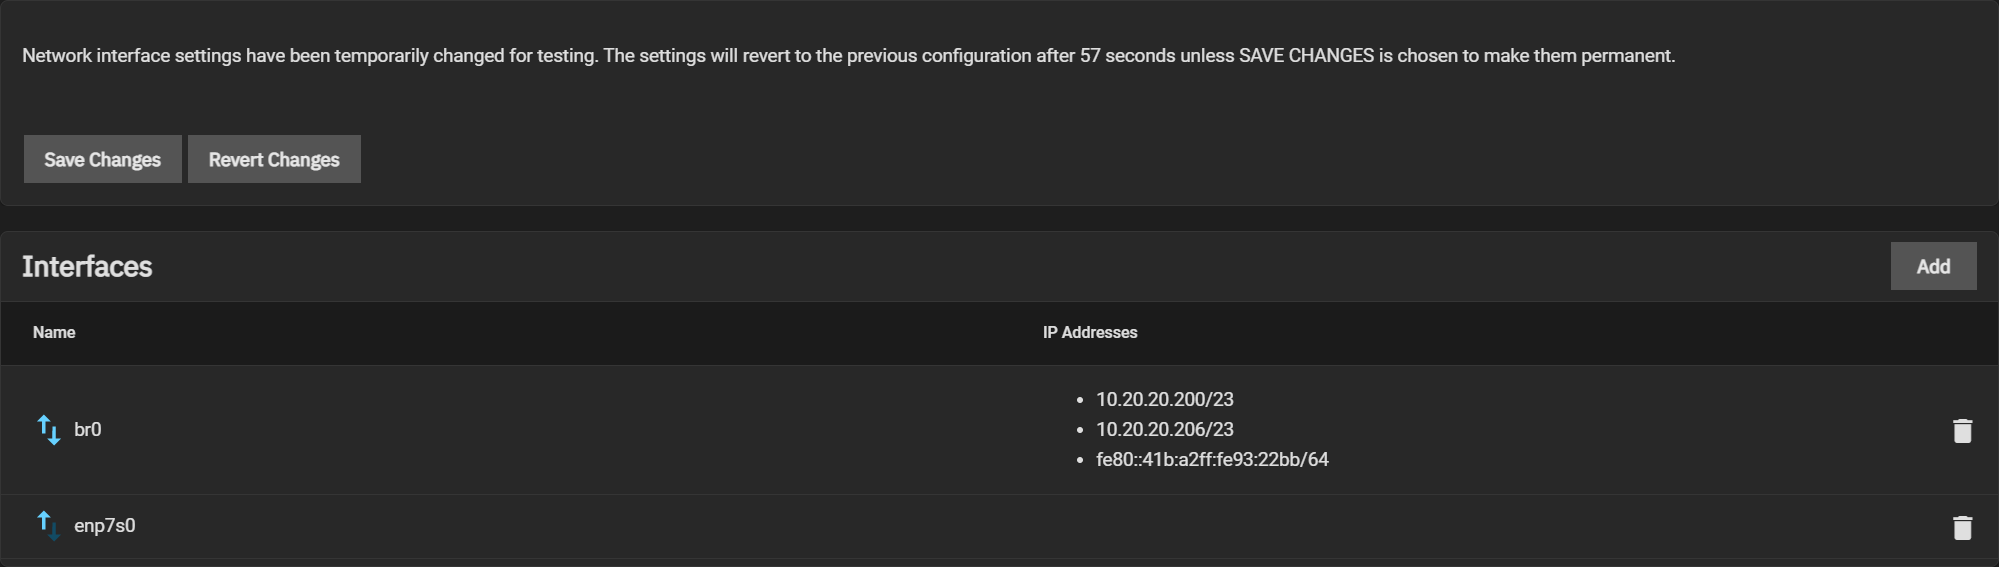
Click the interface. Uncheck the DHCP box, then click Apply.

Click Add in the Interfaces window. Select Bridge for the Type and give it a name (must be in brX format). Check the DHCP box, then select the active interface on the Bridge Members drop-down list. Click Add under IP Addresses and enter the active interface’s IP and subnet mask.
Click Apply, then click Test Changes. Once TrueNAS finishes testing the interface, click Save Changes.
Go to Virtualization, expand the VM you want to use to access TrueNAS storage, and click Devices. Click the three dot symbol in the NIC row and select Edit. Select the new bridge interface from the Nic to attach: drop-down list, then click Save.

You can now access your TrueNAS storage from the VM.
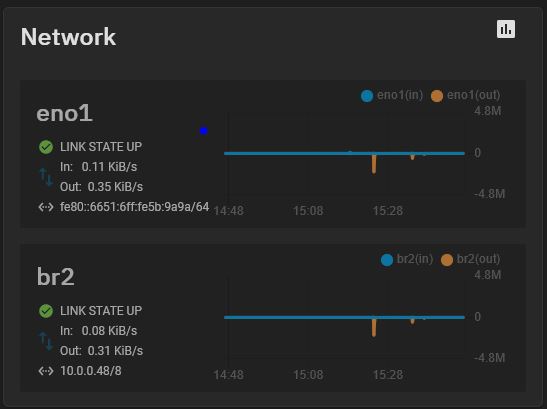
Your network panel on Truenas should look something like this:
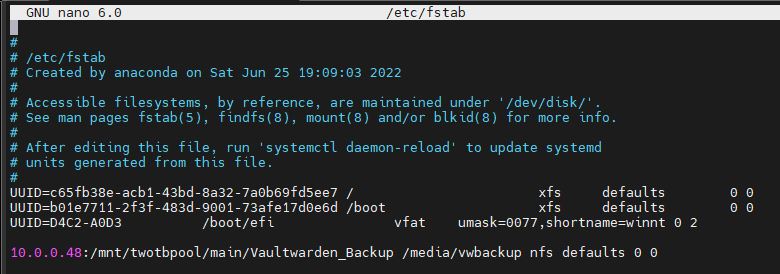
Carrying on from the previously mentioned example, if you were to mount a network share as shown below, you should be able to access it:
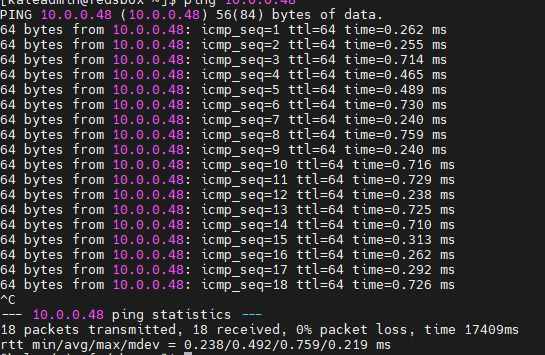
Likewise, when you enter ping 10.0.0.48 on the VM, you should get a response that looks like this:
With this, you are ready to go mount network shares in your Virtual Machines!
No comments to display
No comments to display